

Transforming a sloped yard can feel like a daunting task, especially when you’re working with a budget.
I recently embarked on this journey and discovered some fabulous DIY strategies that made all the difference.
From selecting the perfect plants to adding charming features like terracing and gravel pathways, I found ways to create a beautiful and functional space.
Let’s explore these practical steps together and turn that tricky slope into a stunning outdoor sanctuary.
How to Assess Your Sloped Yard Layout for Improvement
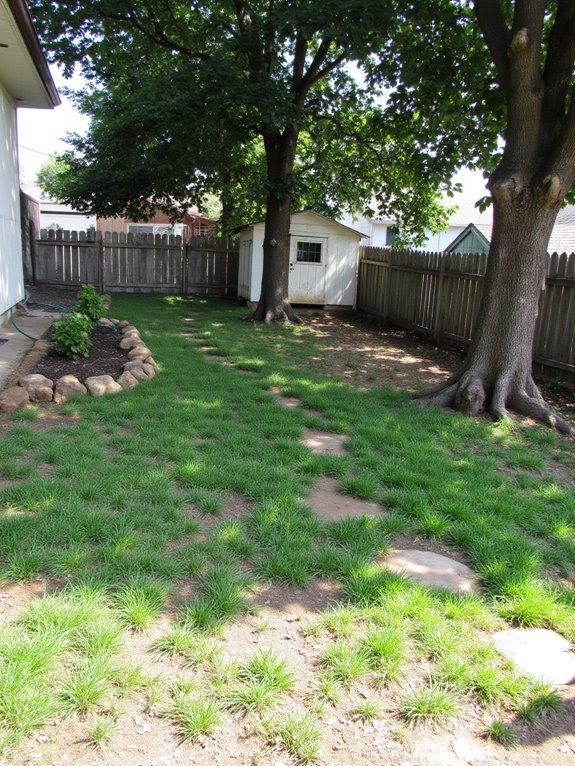
When I look at my sloped yard, I see potential for improvement rather than a challenge.
I start by mapping out the layout, noting any areas that need drainage or sunlight. I consider where I want pathways, plants, and features to enhance the space.
Observing how water flows helps me identify ideal spots for planting and creating terraces for better accessibility.
Set a Budget for Your Garden Upgrade
Setting a budget for my garden upgrade is essential, especially since I want to maximize my investment without overspending.
I start by listing all potential expenses, like soil, plants, and materials.
Then, I prioritize my needs versus wants. It helps to keep track of costs to avoid surprises.
Sticking to my budget lets me enjoy the upgrade without financial stress.
Choose the Right Plants for Your Sloped Yard
Choosing the right plants for my sloped yard can make all the difference in how well the landscape thrives and looks.
I focus on native plants that require less water and maintenance. Ground covers like creeping thyme or sedum help with erosion, while hardy shrubs add structure.
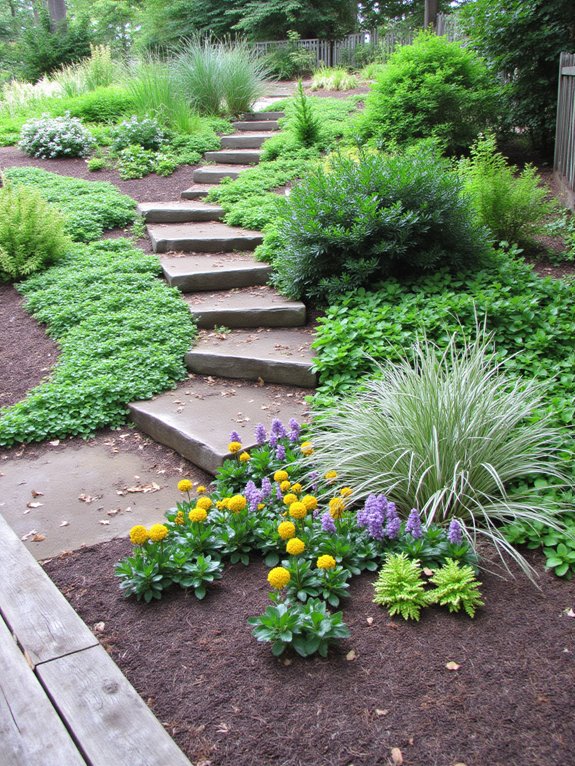
Implement Terracing for Level Spaces
Although implementing terracing might seem like an intimidating task, I found it to be an effective way to create level spaces in my sloped yard.
By outlining sections with stakes and string, I marked each tier’s height. Then, I removed excess soil and added flat stones for a natural look.
I loved how it transformed my space, making it more usable and visually appealing.
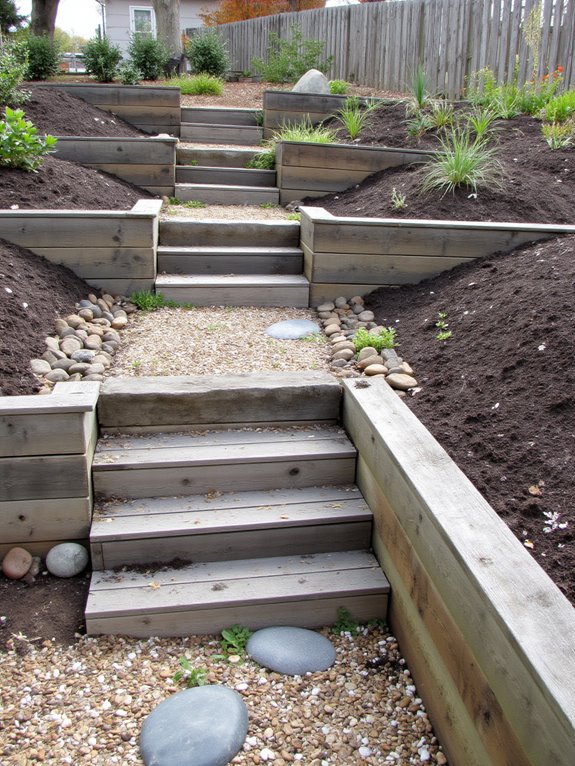
Build a Retaining Wall to Keep Your Yard Steady
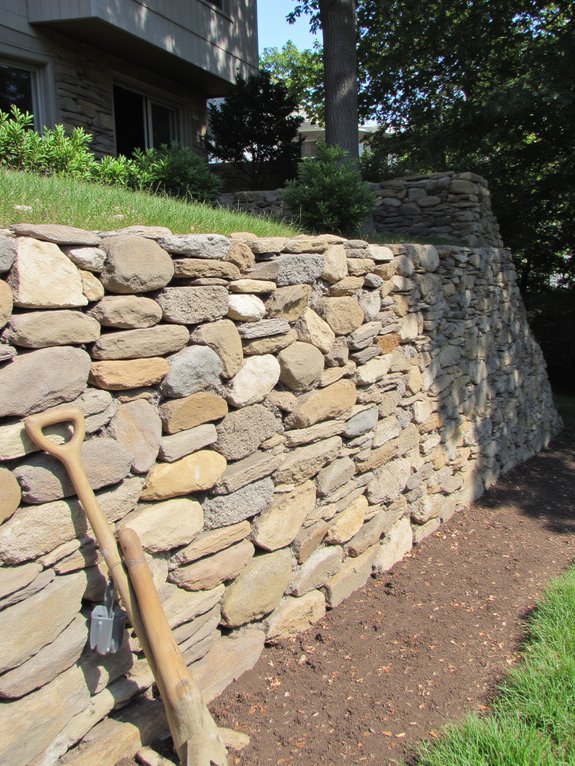
Building a retaining wall can be a game-changer for stabilizing your yard and preventing soil erosion.
I found that using interlocking blocks made the process easier. First, I marked the area, ensuring it followed the slope. Then, I dug a trench for the base, leveled it, and stacked the blocks securely.
This simple project not only enhanced my yard’s appearance but also provided necessary support.
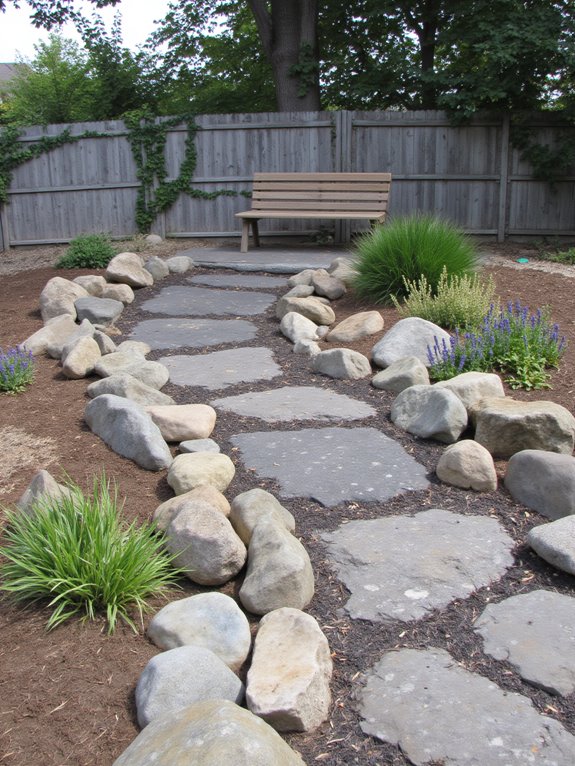
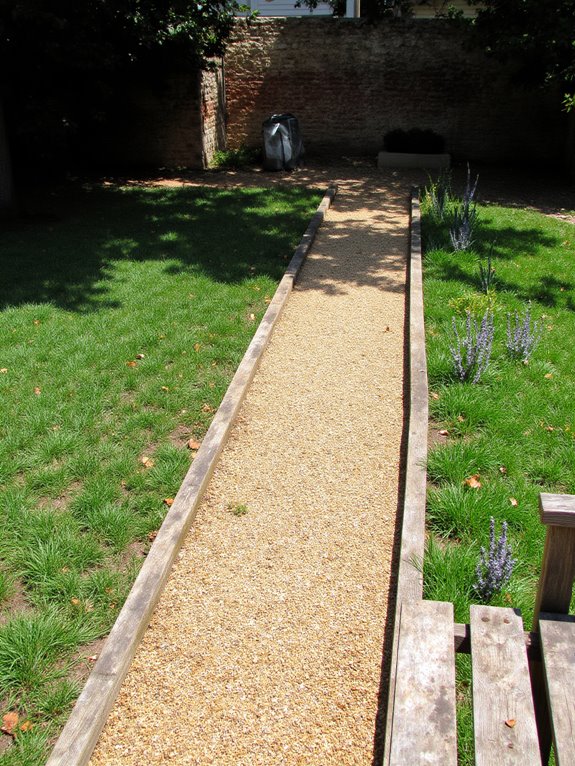
Create Pathways for Enhanced Accessibility

After reinforcing my yard with a sturdy retaining wall, I realized that creating pathways would further enhance its accessibility and aesthetic appeal.
I started by mapping out the routes, considering natural flow and function. Using gravel and pavers, I shaped the pathways to connect different areas.
This not only made it easier to navigate but also added a charming, inviting touch to my landscape.
Use Mulch to Prevent Soil Erosion on Slopes
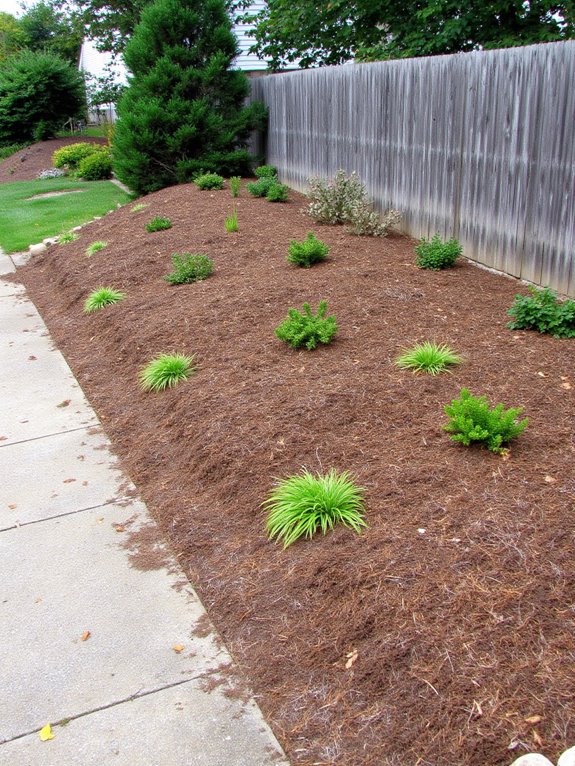
When I noticed the slopes in my yard were prone to erosion, I knew it was time to take action.
I decided to use mulch as a simple solution. Spreading a thick layer of mulch helped retain moisture and protect the soil from heavy rains.
Plus, it added a nice touch to the landscape while keeping my slopes stable and healthy.
Install a Dry River Bed for Effective Drainage
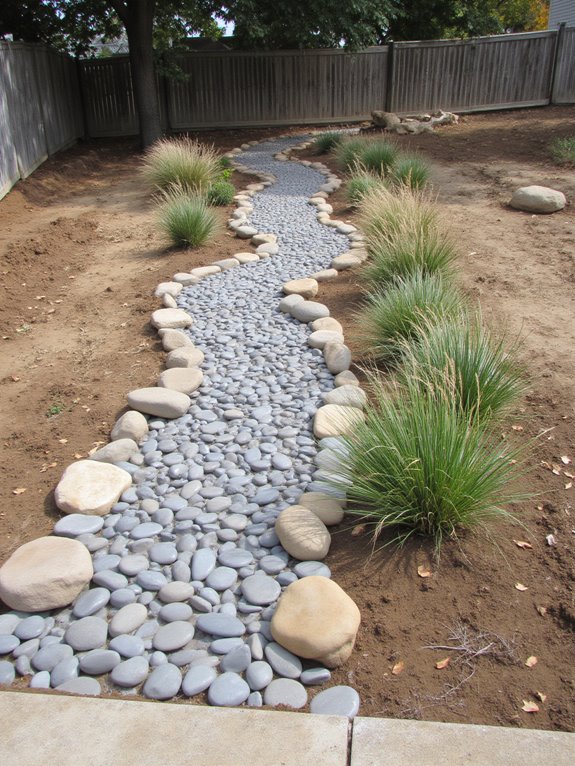
Since I’ve struggled with water pooling in my yard during heavy rains, I decided to install a dry river bed for effective drainage.
First, I marked the path where I wanted the river bed to flow. Then, I dug a trench and lined it with landscape fabric.
Finally, I filled it with smooth stones, creating an attractive, functional solution to manage excess water.
Incorporate Ground Covers to Stabilize Soil
Incorporating ground covers has been a game changer for stabilizing soil in my yard.
I’ve planted low-maintenance varieties like creeping thyme and sedum, which not only keep the soil intact but also add beauty. These plants spread quickly and create a lush carpet that prevents erosion.
Plus, they require minimal water, making them perfect for my budget-friendly upgrade.
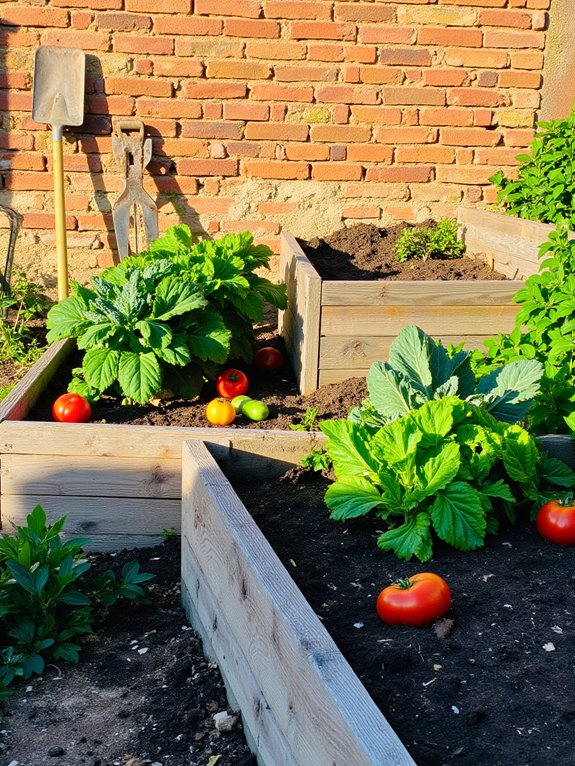
Build Raised Garden Beds for Easy Access

Building raised garden beds not only makes gardening easier but also enhances my outdoor space.
I love how they provide better access for planting and maintenance, reducing the strain on my back.
Plus, they allow me to control soil quality more effectively.
With some simple materials and a bit of effort, I’ve transformed my sloped yard into a productive garden oasis.
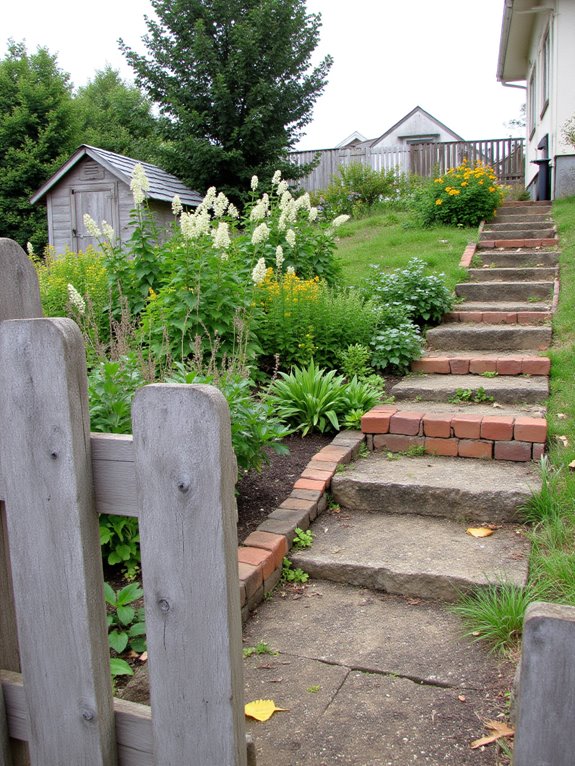
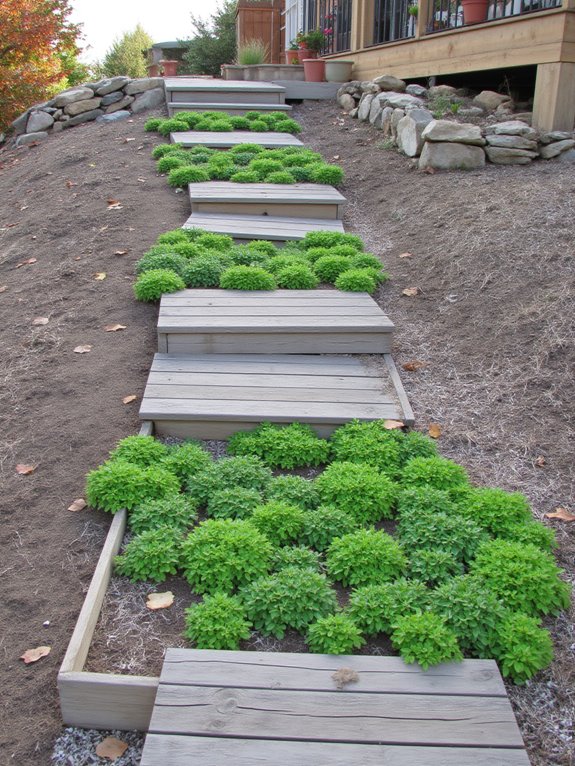
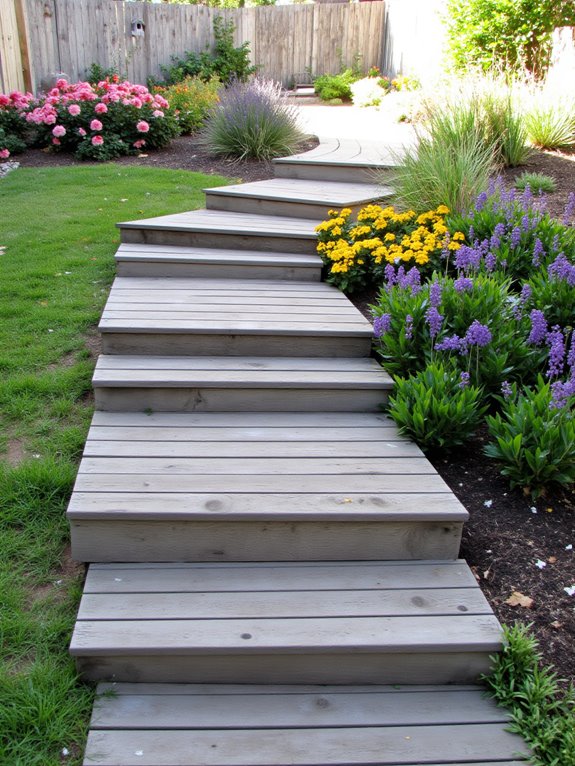
Add Steps for Safe Navigation on Slopes
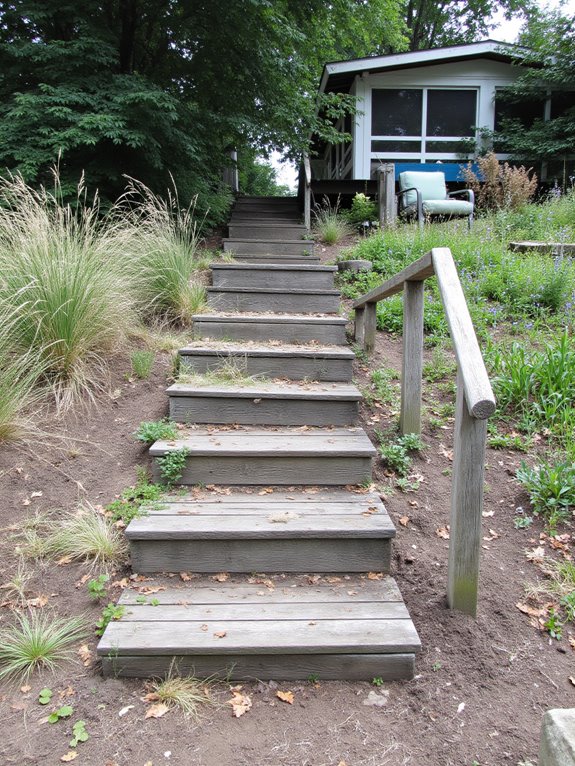
While traversing a sloped yard can be tricky, adding steps especially improves safety and accessibility.
I found that using natural materials like wood or stone not only blends well with the landscape but also provides stability.
Start by measuring the slope, then create a design that fits your space.
Begin by assessing the slope and designing steps that complement your yard’s unique layout.
Trust me, sturdy steps will make maneuvering your yard much safer for everyone.
Create a Rock Garden for Visual Interest
Creating a rock garden not only enhances the visual appeal of your yard but also offers a low-maintenance landscaping solution.
I love selecting different sized rocks and arranging them creatively, adding texture and interest. Incorporating drought-resistant plants between the stones gives life to the garden without requiring much upkeep.
You’ll enjoy the beauty and simplicity of your new rock garden for years to come!
Design a Vegetable Garden on Your Sloped Yard
If you’ve got a sloped yard and dream of growing your own vegetables, it’s easier than you might think to transform that incline into a productive garden space.
Start by creating terraced beds to prevent erosion and improve accessibility. Use native plants to enhance drainage, and choose vegetables suited for your climate.
With a bit of planning, you can cultivate fresh produce right at home!
Add a Fire Pit for Outdoor Gatherings
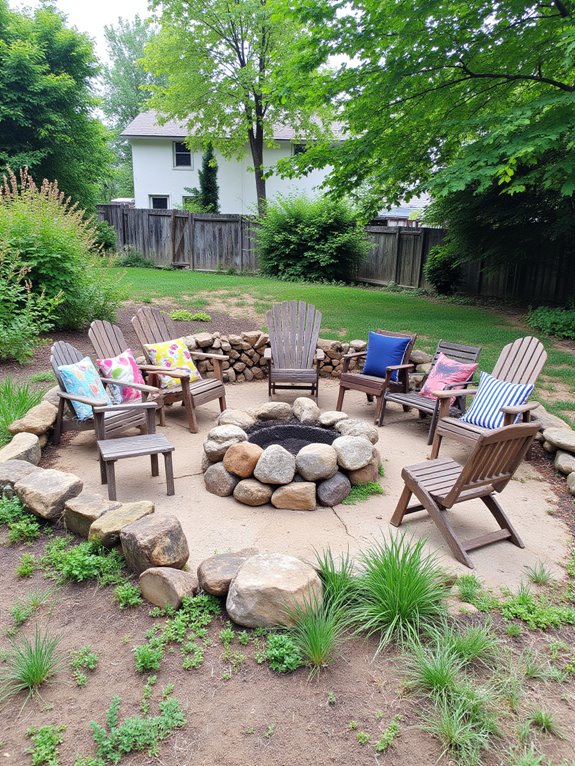
A fire pit can be the heart of your outdoor gatherings, providing warmth and a cozy atmosphere.
I love gathering friends and family around it, sharing stories as the flames dance.
You can easily create one by using stones or a DIY kit.
Add some comfortable seating, and you’ve got the perfect spot for unforgettable evenings under the stars.
Use Edging to Define Your Garden Spaces
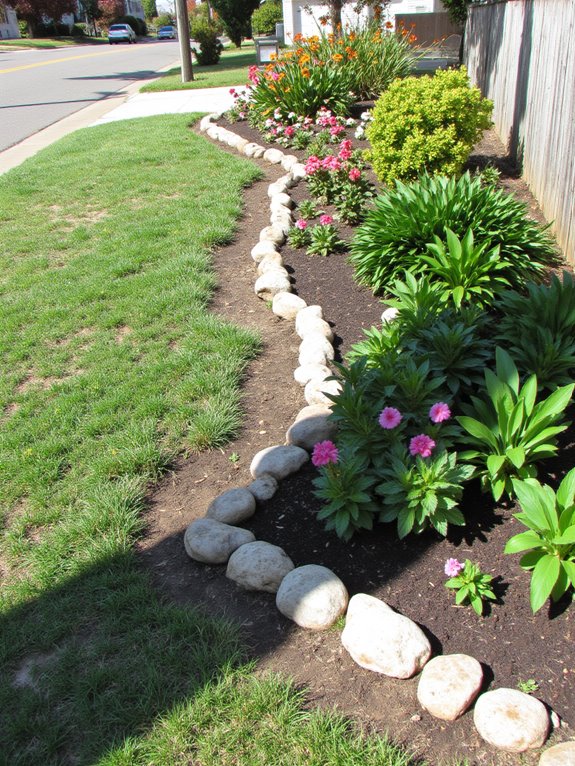
After enjoying those cozy evenings around the fire pit, I realized how important it’s to have clearly defined spaces in my garden.
I decided to use edging to create distinct areas for plants, pathways, and seating.
It not only adds structure but also enhances the overall aesthetic.
Plus, it’s an affordable way to elevate my garden’s look and feel!
Build a Compost Bin for Eco-Friendly Gardening
While I was looking for ways to make my garden more sustainable, I stumbled upon the idea of building a compost bin.
It’s simple and budget-friendly! I used wooden pallets to create a sturdy structure.
Now, I toss in kitchen scraps and yard waste, turning them into nutrient-rich compost.
I add kitchen scraps and yard waste, transforming them into rich, nourishing compost for my garden.
It’s a great way to reduce waste and enrich my soil naturally.
Install Drip Irrigation for Efficient Watering
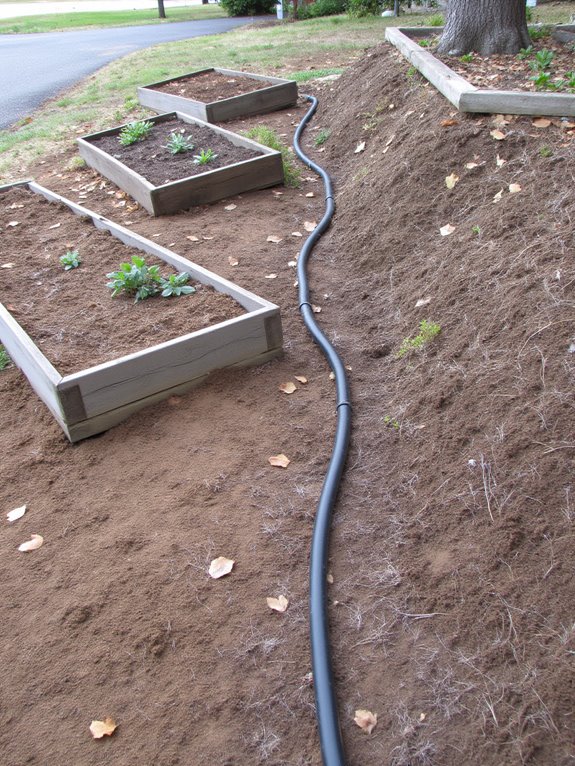
To make watering my garden more efficient, I decided to install a drip irrigation system.
I gathered the necessary materials, including tubing and emitters, and mapped out my garden layout.
After laying the tubing along my plants, I connected the emitters to guarantee each plant received the right amount of water.
This system not only saves water but also keeps my plants thriving!
Create a Cozy Seating Area Around Your Fire Pit

With my garden thriving thanks to the new drip irrigation system, I turned my attention to enhancing my outdoor space.
I decided to create a cozy seating area around my fire pit. I found affordable outdoor chairs and added soft cushions for comfort.
Surrounding the pit with gravel not only looked great but also kept things tidy.
Now, it’s my favorite spot to unwind!
Use Gravel for Low-Maintenance Areas
While I appreciate a lush garden, I know that maintaining one can be time-consuming.
That’s why I’ve turned to gravel for low-maintenance areas. It’s affordable, easy to install, and creates a clean look.
Gravel offers an affordable, stylish, and low-maintenance solution for outdoor spaces.
Simply lay down some landscape fabric to prevent weeds, then spread the gravel evenly.
You’ll save time and effort while still enjoying a stylish outdoor space.
Incorporate Native Plants for Better Adaptation

How can incorporating native plants transform your garden into a thriving ecosystem?
I’ve found that native plants adapt better to local conditions, requiring less water and maintenance. They attract beneficial insects and pollinators, promoting biodiversity.
Plus, they blend seamlessly with the surrounding landscape, enhancing your garden’s natural beauty.
Plan for Seasonal Interest With Colorful Blooms
To create a garden that captivates throughout the seasons, I carefully select flowers that bloom at different times of the year.
I love mixing early spring daffodils, summer’s vibrant zinnias, and autumn’s rich chrysanthemums.
By planning for seasonal interest, I guarantee there’s always something colorful to enjoy.
Planning for seasonal interest ensures a vibrant garden, bringing joy and color all year round.
This approach not only enhances the landscape but also keeps my gardening experience fresh and exciting.